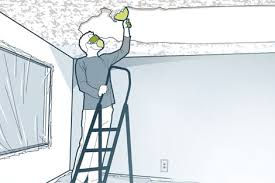
Popcorn Ceilings Can Be Frightening-- But They Don't Have To Be.
- Ted R.
- Aug 20, 2017
- 3 min read
Updated: Oct 10, 2025

911: What's your emergency?
Caller: I have some sort of fungus in my house.
911: Fungus? Is it everywhere?
Caller: No, just on the ceiling.
911: Can you describe it for me?
Caller: Well it's kinda dingy white and bumpy looking. Some of it has fallen off but it doesn't look like it's growing back. Please! Please! Send someone out as soon as possible!
911: You don't need emergency services ma'am, you need to remove your popcorn ceiling texture. Good luck with that... click.
I admit it's a bit of a drastic portrayal of a very common issue. And truly it's not an issue to many people even today. Popcorn ceiling texture was and still is, though not nearly as much as in the past, commonly used as an alternative to the more costly smooth ceiling finish. While some sheetrock finishing is required it certainly isn't to the level that smooth finished ceilings demand. After the initial tape bedding and perhaps a quick skim coat of drywall mud, the contractor will spray on the texture most often directly to the new gypsum board without a primer coat. Why is a coat of primer important? Chances are if you have popcorn texture and you've had a roof leak you already are well aware of the results. Texture that's peeling and falling down. Same is true in a steamy bathroom, generally over the tub but can be all over. Try to peel or scrape away just what looks loose and you've probably started something that just seems to have no end. Ah, but it does.

Removing popcorn ceiling texture altogether is a very viable and appealing option to constant patching that never looks right. It's a simple enough process for any homeowner that wants to attempt the project on their own. Tools are minimal; plastic sheeting to cover any furniture, a pump sprayer for water, a couple of scrapers maybe 4" and 8" wide, a shop vac will be handy, and a respirator. Just youtube and you'll find plenty DIY vids. Getting it off is one thing, preparing for paint is another. Remember earlier I mentioned that the drywall finishing isn't completed to smooth finish level so more likely than not all those sheetrock seams as well as damage done during removal will need at least 1-2 skim coats of mud and sanding before painting. Still, if you're a handy, tenacious person with just the right amount of OCD, you got this. Save some money and be proud to show off your work!

Warning; Proceed with caution! Yes, there are a couple of reason why a homeowner may not want to tackle a job like this. First, if your home was built prior to 1980 there's a very good chance the materials used to texture your ceiling contains asbestos. Breathing sanding dust containing asbestos could lead to serious health issues. And not just your own health but that of others living in the house as well as pets. Every precaution needs to be taken to ensure the health and safety of everyone involved. Other reasons include time, mess, experience (or lack thereof) of drywall finishing and painting. For many the better option is to hire a contractor who'll come in for a fixed price and cover/protect your belongings, safely remove the texture, prep the ceilings for painting including a primer coat plus any additional point up, and cleanup before leaving. Not to be misleading, this process will still take time, will still be messing, will still require safety precautions, and will certainly cost more than DIY.
Bottom Line: If you have the time and patience to remove popcorn texture, do it, you'll be proud of the money you save and the work you've accomplished. On the other hand, if you'd rather do something else with your evenings and weekends besides making a mess in the home you live in perhaps hiring a contractor to do this work while you're at work is the better choice. Better yet have it done while you're on vacation to improve your health rather than taking a chance in tackling a project that may harm it.


Comments